Makefile技巧三则

Three Tricks to use Makefile Efficiently

最近读Protocol Buffer for C,发现一些Makefile的技巧

1. -MMD flag
Makefile比较麻烦的是写dependency。常用技巧是通过g++ -MM和sed脚本从.cpp源文件生成.d文件,这种方式可以解决自动生成依赖关系的问题,但其实有更好的方法:
g++ -MMD -c XXX.c
之后在Makefile里添加:
-include XXX.d

g++的文档提到-MMD:

-MMD
    Like -MD except mention only user header files, not system header files. 

除了-MMD外,有意思的g++参数,可以参见gcc flags 。另外这篇详细讲解Makefile dependency的文章Makefile Autodependency

2. Order-only prerequisites
order-only-prerequisites
用Makefile里的例子来说:

     OBJDIR := objdir
     OBJS := $(addprefix $(OBJDIR)/,foo.o bar.o baz.o)
     
     $(OBJDIR)/%.o : %.c
             $(COMPILE.c) $(OUTPUT_OPTION) $<
     
     all: $(OBJS)
     
     $(OBJS): | $(OBJDIR)
     
     $(OBJDIR):
             mkdir $(OBJDIR)

$(OBJS)需要$(OBJDIR),所以需要把$(OBJS)放在$(OBJDIR)前面;但在建立$(OBJDIR)之后,$(OBJ)就不在需要根据$(OBJDIR)的时间调整了。

3. Multiple line variables (Eval function)
Makefile里的变量可以有多行,这种变量要用define来定义。
使用这种变量有两种场合:(1)Canned Recipes; (2)Eval-Function

第一种就是把常用的一组命令包装在一起,比如:

     define run-yacc =
     yacc $(firstword $^)
     mv y.tab.c $@
     endef

之后调用:

     foo.c : foo.y
             $(run-yacc)

第二种更加常用,比如下面的例子:

     PROGRAMS    = server client
     
     server_OBJS = server.o server_priv.o server_access.o
     server_LIBS = priv protocol
     
     client_OBJS = client.o client_api.o client_mem.o
     client_LIBS = protocol
     
     # Everything after this is generic
     
     .PHONY: all
     all: $(PROGRAMS)
     
     define PROGRAM_template =
      $(1): $$($(1)_OBJS) $$($(1)_LIBS:%=-l%)
      ALL_OBJS   += $$($(1)_OBJS)
     endef
     
     $(foreach prog,$(PROGRAMS),$(eval $(call PROGRAM_template,$(prog))))
     
     $(PROGRAMS):
             $(LINK.o) $^ $(LDLIBS) -o $@
     
     clean:
             rm -f $(ALL_OBJS) $(PROGRAMS)

首先上面注释行以下都是通用(generic)的。
其次eval会两次展开(expand)变量名,所以$(1)会被扩展成prog(比如server),$$($(1)_OBJS)会被扩展成$(server_OBJS),之后会再次被扩展成server.o server_priv.o server_access.o

最精彩的地方是如何把上面3个技巧联合起来。下面看一下cloudwu的Protocol Buffer for C项目的Makefile片段:

BUILD = build

LIBSRCS = context.c varint.c array.c pattern.c register.c proto.c map.c alloc.c rmessage.c wmessage.c bootstrap.c stringpool.c
LIBNAME = libpbc.$(SO)

TESTSRCS = addressbook.c pattern.c
PROTOSRCS = addressbook.proto descriptor.proto

BUILD_O = $(BUILD)/o

all : lib test

lib : $(LIBNAME)

clean :
	rm -rf $(BUILD)

$(BUILD) : $(BUILD_O)

$(BUILD_O) :
	mkdir -p $@

LIB_O :=

define BUILD_temp
  TAR :=  $(BUILD_O)/$(notdir $(basename $(1)))
  LIB_O := $(LIB_O) $$(TAR).o
  $$(TAR).o : | $(BUILD_O)
  -include $$(TAR).d
  $$(TAR).o : src/$(1)
	$(CC) $(CFLAGS) -c -Isrc -I. -fPIC -o $$@ -MMD $$<
endef

$(foreach s,$(LIBSRCS),$(eval $(call BUILD_temp,$(s))))

$(LIBNAME) : $(LIB_O)
	cd $(BUILD) && $(CC) --shared -o $(LIBNAME) $(addprefix ../,$^)

有意思的地方是BUILD_temp,将每一个$(1)的值赋给TAR,之后$(TAR)在$(BUILD_O)目录下编译,编译时的依赖关系被-include到Makefile内部(include前的减号,-,表示要include的文件即使不存在也不报错),同时把编译好的$(TAR).o加入到LIB_O变量中(+=赋值)。
R代码除错 (How to debug R code)

R代码除错 (How to debug R code)
Tricks about how to debug R code

使用R的用户中很多人抱怨R的代码不好调试。对我来说,我觉得R至少比Perl好一点,因为至少R的说明档丰富,至少看的懂源码。好了,长话短说,R的界面很简单,没有Visual studio那么强大的调试器,也没有GDB那样灵活的调试命令(见 GDB 使用经验, GDB 使用经验(二)),我总结出来以下5种调试方法,用在不同的场合。当然话说回来,还是尽量写没有bug的代码,一劳永逸。

1. 传统调试函数
traceback(), debug(), trace(), browser(), recover()
traceback() 是在出错退出后,打印出调用堆栈的情况
debug() 是将断点设置在一个函数上,这个函数被调用的时候会变为单步执行,因此我们可以手动跟踪,只不过这里不如gdb灵活
trace() 等于是在函数中插入额外的调试代码,例如:trace(sum)在每次调用sum的时候打印出sum的参数;又比如
## arrange to call the browser on entering and exiting
## function f
trace(“f”, quote(browser(skipCalls=4)), exit = quote(browser(skipCalls=4)))
则表示使用browser()来调试,从第5次开始
browser():这个函数往往作为参数,被调用时用户可以检查变量。用户可以输入c表示继续,n表示下一条指令,Q表示退出
recover():和browser类似,也是被调用。不同在于用户可以选择不同的frame(堆栈深度)。

2. 更传统的调试函数print(),cat()
使用print()来打印每个变量调用时候的值;
更简单的情况可以用cat(),它的语法更简单,例如cat(“x=”, x)

3. 设置options(error=…)
我们希望出错的时候,R可以停止执行后续代码,并进入我们指定的调式模式。
在R的交互界面,可以设置:
options(error=recover)
在Rscript,即命令行方式,可以用下面的话把出错信息存储到文件:
options(error = quote({dump.frames(to.file=TRUE); q()}))

调试完毕,恢复初始设置时,可以用:
options(error = NULL)

这里举个例子吧( 出处):
错误的情景:

x <- 1:5
y <- x + rnorm(length(x),0,1)
f <- function(x,y) {
  y <- c(y,1)
  lm(y~x)
}

我们调试的时候,输入:

options(error=recover)

> f(x,y)
Error in model.frame.default(formula = y ~ x, drop.unused.levels = TRUE) : 
  variable lengths differ (found for 'x')

Enter a frame number, or 0 to exit   

1: f(x, y)
2: lm(y ~ x)
3: eval(mf, parent.frame())
4: eval(expr, envir, enclos)
5: model.frame(formula = y ~ x, drop.unused.levels = TRUE)
6: model.frame.default(formula = y ~ x, drop.unused.levels = TRUE)

Selection: 1
Called from: eval(expr, envir, enclos)
Browse[1]> x
[1] 1 2 3 4 5
Browse[1]> y
[1] 1.6591197 0.5939368 4.3371049 4.4754027 5.9862130 1.0000000

通过检查x和y的值就能发现问题了。

4. 设置断点 setBreakpoint()
从R 2.10开始,我们有了两个调试相关的函数findLineNum(), setBreakpoint()
有了断点,我们可以快速执行代码,直至有可能的错误部分(想想如果只有debug()则需要人工单步执行R语句,或者错误发生后recover(),我们需要反推到底是什么造成的错误)。这将大大提高我们除错的速度。
出处

这里举个例子展示如何在第3行设置断点:

x <- " f <- function(a, b) {
             if (a > b)  {
                 a
             } else {
                 b
             }
         }"


eval(parse(text=x))  # Normally you'd use source() to read a file...

findLineNum("<text>#3")   # <text> is a dummy filename used by parse(text=)

#This will print
#f step 2,3,2 in <environment: R_GlobalEnv>

#and you can use

setBreakpoint("<text>#3")

5. *apply 函数中如何调试:
用过R的都知道在循环中出错不容易。因为R处理循环很慢,我们往往不用for循环,而用sapply(), lapply()等等。这些函数出错的时候从来不会说是第几个循环变量出错的。对此,我们有如下方法:

使用try()函数, 出处
举个例子:

> x <- as.list(-2:2)
> x[[2]] <- "what?!?"
> ## using sapply
> sapply(x, function(x) 1/x)
Error in 1/x : non-numeric argument to binary operator
# 看看用try()函数怎么样?
> sapply(x, function(x) try(1/x))
Error in 1/x : non-numeric argument to binary operator
[1] "-0.5"                                                    
[2] "Error in 1/x : non-numeric argument to binary operator\n"
[3] "Inf"                                                     
[4] "1"                                                       
[5] "0.5"

或者第三方程序库也行:
出处
foreach(.verbose= TRUE) —— 这个我没试验出来,不过foreach仍然是个强大的工具
plyr(.inform=TRUE)
给个plyr库的例子:

> laply(x, function(x) 1/x, .inform = TRUE)

Error in 1/x : non-numeric argument to binary operator
Error: with piece 2: 
[1] "what?"

另外题外话,R里面执行install.packages()的时候,只有头一次可以选repo(镜像库)的位置,如果之后你还想选不同的镜像库怎么办?可以执行这个:
options(“repos”=c(CRAN=”@CRAN@”))

最后把参考过的网页列在下面:
【1】Getting the state of variables after an error occurs in R
【2】What is your favorite R debugging trick?
【3】Debugging lapply/sapply calls
【4】R script line numbers at error?

如何在Python中调用C/C++代码

如何在Python中调用C/C++代码
How to mix C/C++ code in Python

本文介绍一种手动的、简单的在Python中使用C/C++代码的方式。这个方法主要使用了ctypes模块。其他的混合Python,C/C++编程的方法还有Swig Boost.Python。前一种方法需要写一个接口文件(interface),而后一种需要使用庞大、深奥的boost类库,后两者适合可能适合更复杂的情况,这里只介绍第一种方法。

混合C/C++代码需要这几步:
1. 包装接口 C/C++ wrap functions up
2. 打包成共享库 Compiling C/C++ code and pack it to shared library
3. Python中导入共享库 Python imports shared library

先介绍一下北京,这里我的C++类GenomeSequence使用了模板(Template)和Memorymap,这是一个访问基因序列的类,比如如果一个生物序列是GAGTTTTATCGCTTCCATGACGCAGAAGTTAACACT… 我们的类是gs,那么gs[0] = ‘G’, gs[1]=’A’ …. 摘录相关的函数如下:

class GenomeSequence : public genomeSequenceArray
{
public:
    /// Simple constructor - no implicit file open
    GenomeSequence();
    /// set the reference name that will be used in open()
    /// \param referenceFilename the name of the reference fasta file to open
    /// \return false for success, true otherwise
    ///
    /// \sa open()
    bool setReferenceName(std::string referenceFilename);
    /// return the number of bases represented in this reference
    /// \return count of bases
    genomeIndex_t   getNumberBases() const
    {
        return getElementCount();
    }
    inline char operator[](genomeIndex_t index) const
    {
        uint8_t val;
        if (index < getNumberBases())
        {
            if ((index&1)==0)
            {
                val = ((uint8_t *) data)[index>>1] & 0xf;
            }
            else
            {
                val = (((uint8_t *) data)[index>>1] & 0xf0) >> 4;
            }
        }
        else
        {
            val = baseNIndex;
        }
        val = isColorSpace() ? int2colorSpace[val] : int2base[val];
        return val;
    }
    /* ........... more codes omitted ................ */
}

但实际上这些细节并不重要,重要是如何包装,我们编写GenomeSequence_wrap.cpp文件,包括对上述4个函数的封装,源码如下:

#include "GenomeSequence.h"
#include <string>

extern "C"{
    GenomeSequence* GenomeSequence_new(){ return new GenomeSequence();}
    bool GenomeSequence_setReferenceName(GenomeSequence* gs, char* s) { 
        if (!gs) return false;
        std::string str = s;
        //printf("Loading %s ...\n", s);
        if (!gs->setReferenceName(str)){
            gs->open();
        } else {
            printf("Loading FAIL\n");
        }
        return (gs->setReferenceName(str));
    }
    void GenomeSequence_close(GenomeSequence* gs) {if (gs) gs->close();};
    int GenomeSequence_getNumBase(GenomeSequence* gs) {
        if (!gs) {
            printf("invalid gs\n");
            return -1;
        }
        return (gs->getNumberBases());
    }
    char GenomeSequence_getBase(GenomeSequence* gs, unsigned int i) { 
        if (gs) {
            return (*gs)[i];
        };
    };
}

第二步是编译,记住单个C/C++文件编译时使用-fPIC参数,最后打包的时候编译成共享库,摘录Makefile文件中片段如下:

lib:
	g++ -c -fPIC -I./lib GenomeSequence_wrap.c
	g++ -shared -Wl,-soname,libstatgen.so -o libstatgen.so  lib/*.o lib/samtools/k*.o lib/samtools/bgzf.o *.o

最后一步是在Python中写一个封装类,注意前两行引入ctypes库,之后就用这个库调用包装函数就行。
注意:我在GenomeSequence类的__getitem__中使用了如何扩展Python的容器类一文中介绍的一些技巧,这样可以更灵活的使用下标来访问数组中的元素。

from ctypes import cdll
lib = cdll.LoadLibrary("./libstatgen.so")

class GenomeSequence:
    def __init__ (self):
        self.obj = lib.GenomeSequence_new()
    def open(self, filename):
        lib.GenomeSequence_setReferenceName(self.obj, filename)
    def __len__ (self):
        return lib.GenomeSequence_getNumBase(self.obj)
    def __getitem__(self, key):
        if isinstance(key, int):
            return chr(lib.GenomeSequence_getBase(self.obj, key))
        elif isinstance(key, slice):
            return ''.join([self[x] for x in xrange(*key.indices(len(self)))])
        elif isinstance(key, tuple):
            return ''.join([self[i] for i in key])

    def at(self, i):
        return chr(lib.GenomeSequence_getBase(self.obj, i))
    def close(self):
        lib.GenomeSequence_close(self.obj)
    
if __name__ == '__main__':
    gs = GenomeSequence ()
    gs.open("/home/zhanxw/statgen/src/karma/test/phiX.fa");
    print len(gs)
    seq = [(gs.at(i)) for i in xrange(60)]
    print ''.join(seq)
    print gs[0:10],gs[20:30]
    print gs[0:10, 20:30]
    print gs[-10:]
    gs.close()
    print "DONE"

本文主要参考【1】。这里的方法基本重复了【1】中的步骤。写出本文中的代码在于进一步验证ctypes库可以灵活的处理C/C++和Python中的简单数据类型int, char*。

【1】Calling C/C++ from python?

如何扩展Python的容器类

如何扩展Python的容器类
How to extend Python container class (using some idiom)

本文假设已经有一个C++语言写的array类型的数据结构,可以用v.getBase(unsigned int i) 来得到v 数组在下标i的数值。我们想利用Python灵活的slice功能,比如1:10, 1:10:2, -10:-5等方式来指定不同的下标。这种灵活的下标在Python中可以有三种形式:

1. 整数: v[1]
2. slice 对象: v[1:10]
3. tuple 对象: v[1:10, 20:30]

这三种对象都会被传到__getitem__(self, key)的key参数中。通过参考【1】,【2】,我发现下面的代码可以简洁的处理上述所有情况:

 
class ContainerClass:
    def __getitem__(self, key):
        if isinstance(key, int):
            return chr(v.getBase(self.obj, key))
        elif isinstance(key, slice):
            return ''.join([self[x] for x in xrange(*key.indices(len(self)))])
        elif isinstance(key, tuple):
            return ''.join([self[i] for i in key])

注意:
这里只是代码片段。全部代码见另一片Blog:如何在Python中调用C/C++代码

【1】Python Data Model:
http://docs.python.org/reference/datamodel.html
【2】Python in a nut shell:
http://books.google.com/books?id=JnR9hQA3SncC&pg=PA110&lpg=PA110&dq=python+slice+object+idiom&source=bl&ots=Jb1XIv_71t&sig=-_NHkwycfC8yipkc4Tl_e4sruKc&hl=en&ei=uRXfTcr5Jsro0QHa4sG5Cg&sa=X&oi=book_result&ct=result&resnum=10&ved=0CF0Q6AEwCQ#v=onepage&q=python%20slice%20object%20idiom&f=false

关于Fix Bug (读Coolshell Linux 2.6.39-rc3的一个插曲有感)

云风的buzz中提到了coolshell.cn的一篇文章Linux 2.6.39-rc3的一个插曲有感,看过之后,有两个感受:
(1)Linus 提出的 ‘think and analyze’的解决方式。
对于bug,从我解读Linus和Cloud的buzz回复来看,他们对于bug的方式都是知其然也知其所以然,即要么不去改bug,要么就把bug想清楚了从系统上改好。就像给一个人看病,要是治胃疼,不是说你少吃点,或者是来几片止疼药,而是调查清楚为什么得了胃病。要是长期不规律吃饭得的胃病,恐怕最好的解决方法是养成按时吃饭的习惯。这样做会增加改一个bug的时间。但从长远来看,我们有可能节省时间。比如:如果我们引入magic number之后,一个星期之后,又有类似的bug发现了,如果我们每个bug都是通过仔细思考,而且系统构建有足够的正交性的话,我们会很自然的想到,这个bug肯定发生在其他部位,而不太可能是刚修复bug的变体,这就减少了解决问题时的思考路径,节省了时间。这个时候,我们应该对自己说Good job,给自己多一点鼓励。
而有时,我们可能在别人的代码里发现了bug,这种情况下同样适用Linus的建议,即‘think and analyze’或者是’years and years of testing on thousands of machines’。要不能通过思考和分析解决问题,要么就用历史证明过的已经work的代码。这样即使不能fix 这个bug,也不会造成fix bug的假象,从而避免以后有的版本work,有的版本不work的现象。读通别人的代码并不简单,这个’think and analyze‘的过程也许要很多天,因为这个过程强迫我们用别人的思维结果来思考,而我们很难知道为什么别人这样做。个人认为,如果有足够的单元测试和高质量的文档,这个思考分析的时间并不是浪费,而是学习其他人编程思路和技巧的机会。同时,我们应该让老板知道,我们需要时间来读代码,我们在解决问题,但是的确需要时间。如果一个系统的核心部分很难读懂,而bug并不关键,不妨告诉自己不要太完美主义(想想iphone,没有多任务,电池续航有限,价格高,但仍然一个好产品)。

总而言之,Linus的观点就是每看到一个bug,问一下你确实了解这个bug的原理么?
如果Yes: (think and analyze之后),准备重组的理由,用别人可以理解的方式改(少用magic number)。
如果No: (‘years and years of testing on thousands of machines’) 回到以前测试好的版本,并且注明这个bug没有被fix。
这就是Linus认为的: It really is that simple. It’s _always_ that simple.

(2)对Yinghai Lu的评价
首先Yinghai Lu是一个kernel开发者,我认为他是有足够的相关经验的:很快发现了问题,提出了一种解决方法
陈皓认为“我没有想到Linux 内核组会有像Yinghai这样工作的方式,毕竟这是一个黑客级的开发团队。” 我认为言之过甚。
Yinghai 的 email 中说:” can you try following change ? it will push gart to 0x80000000″ (你能不能试试这个?)
而陈皓说“给出了个fix”,他认为Yinghai提出的是会加入到kernel code中的patch,我想这不一定是Yinghai的本意。

以我的理解来看,Linus一直负责code review,他希望code的质量高,有注释,不能随意fix bug (改一两个数)。因此他非常反感code中的magic number,以及只改code不管背后的逻辑;而Yinghai Lu做为开发者,首先想到的是找到问题的原因。他自己的电脑里没法重复这个bug,因此他需要把patch交给别人来测试。在不同的立场下,Linus生气 和 Yinghai的解释 就容易理解了。

我不清楚kernel开发的具体流程是怎样的。但我认为Yinghai 试图做的是在top down这个框架下做修补,他不想或者不能够对整个top down的机制做出修补,特别是这个机制下已经有垃圾代码的情况下(见HPA的回信)。在Linus看来,他是不希望看到top down这种新尝试(相对于bottom up)缺乏足够的调研支持的。至于未来Linux kernel的采用机制,将要由kernel 开发者们和Code reviewer之间做出协调,也要和以往的低质量代码做出协调。我会拭目以待。

GDB 使用经验(二)

GDB 使用经验(二)
Hints of using GDB inside Emacs

继续前文GDB 使用经验, 这里介绍在Emacs中使用GDB的一点经验。

(1) GDB many windows mode 【1】

在M-x gdb 启动Emacs 中的GDB mode 之后,我们可以 M-x gdb-many-windows, 将GDB comand(GDB 命令)、local variable(局部变量)、source code(源程序代码)、stack(堆,用于检查函数调用的层数)、breakpoints(所有已经设置的断点)这5个有用的窗口排列起来。

如果想少打几个键,可以把下面的代码放到~/.emacs,这样以后M-x gmw 就等于是M-x gdb-many-windows了。

(defun gmw ()
"start gdb-many-windows"
(gdb-many-windows))

(2) 快捷键 Short cuts

在GDB中, 常用的命令包括continue, next等等。在Eamcs中的快捷键因窗口的不同而不同。例如,在GDB command窗口,next 的快捷键是C-x C-a C-n,而在source code窗口, next的快捷键是C-c C-n。但我们可以总结规律为基本命令都是prefix + key 的形式。

在GDB command 窗口的prefix 都是:C-c
在source code 窗口的prefix 都是:C-x C-a

key对应于next命令是: C-n
key对应于step命令是: C-s
key对应于until命令是: C-u
key对应于continue命令是: C-r
key对应于finish命令是: C-f
key对应于watch expression命令是: C-w (光标所在的变量会被watch,会出现另外一个窗口显示该变量)
key对应于print expression命令是: C-p (需要先mark一个region,这个region表示的expression表达式会被打印出来)
key对应于temporary breakpoint(临时断点)命令是: C-t
key对应于delete breakpoint(删除断点)命令是: C-d (如果当前行有断点,则删除之)

(3) Enable tools tips 【2】

在Visual Studio中另一个有用的功能是:当鼠标移动到一个变量上时,这个变量的值会通过tooltip的方式显示出来。
这个功能在GDB中也能实现。
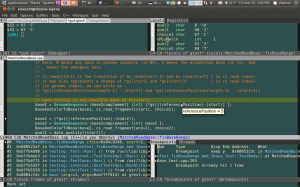
在GUD菜单中选中”Show GUD tooltips”即可。使用效果如下:

【1】Fancy Debugging
【2】Tooltips

GDB 使用经验

本文介绍一些常用的GDB技巧


(1)使用.gdbinit

在.gdbinit里可以使用 define 命令,来简化复杂命令的输入,例如重定向stdout, stderr:
def redirect
call (void)close(1)
call (void)close(2)
call (int)open($arg0, 2)
end

之后就可以用

(gdb)redirect(“/dev/ttyp3”)

来把输入输出重定向到tty3 (这个/dev/tty3可以用 shell tty命令获得)
这个例子选自http://blogold.chinaunix.net/u3/111274/showart_2162256.html

此外,还可以给这个别名加上帮助说明性文字,格式为:
document user-defined-command
帮助说明性文字
end

例如:
document redirect
redirect stdout and stderr to arg0
end

.gdbinit中还可以定义hook函数(http://dev.firnow.com/course/6_system/linux/linuxjq/20090307/159416.html),
例如想在print命令前显示一段“———-”,:
define hook-print
echo ———-\n
end

.gdbinit会被GDB默认读取,如果有特定的配置文件,可以用source命令(类似bash的source命令)

(2)补充一些有用的命令

用whatis命令检查变量的类型,
ptype:比whatis的功能更强,他可以提供一个结构的定义,
commands 命中断点时,列出将要执行的命令
使用“rb”命令,如果执行“rb”时不带参数,则表示在所有函数处打一个断点,“rb”后面可以接一个符合正则表达式的参数,用来对符合正则表达式的所有函数打断点
info break 显示当前断点清单,包括到达断点处的次数等。
info files 显示被调试文件的详细信息。
info func 显示所有的函数名称。
info local 显示当函数中的局部变量信息。
info prog 显示被调试程序的执行状态。
info var 显示所有的全局和静态变量名称。
rwatch 当表达式(变量)expr被读时,停住程序。
awatch 当表达式(变量)的值被读或被写时,停住程序。
save breakpoints — Save current breakpoint definitions as a script
c [count] 表示连续(c)ontinue 多次

from: http://www.cppblog.com/true/archive/2009/01/11/71749.html

(3)print的两个技巧

(gdb)print $1 ($1为历史记录变量,在以后可以直接引用 $1 的值)
l 人为数组
人为数组提供了一种去显示存储器块(数组节或动态分配的存储区)内容的方法。早期的调试程序没有很好的方法将任意的指针换成一个数组。就像对待参数一样,让我们查看内存中在变量h后面的10个整数,一个动态数组的语法如下所示:
base@length
因此,要想显示在h后面的10个元素,可以使用h@10:
(gdb)print h@10
$13=(-1,345,23,-234,0,0,0,98,345,10)

http://moonwater.blogbus.com/logs/2256694.html

(4) GDB 其他应用:显示STL里的数据结构;画图等等

All from GDB wiki
美观的显示STL数据结构,比如std::string, std::vector…
http://sourceware.org/gdb/wiki/STLSupport

画one-dimensinoal图:
http://sourceware.org/gdb/wiki/PlottingFromGDB

其他有意思的extension:
比如检查libc的heap;美观的调试wxWidgets中的变量等等:
http://sourceware.org/gdb/wiki/HomePage

(5)GDB环境变量

(陈皓专栏 【空谷幽兰,心如皓月】 http://blog.csdn.net/haoel/archive/2003/07/02/2879.aspx)
你可以在GDB的调试环境中定义自己的变量,用来保存一些调试程序中的运行数据。要定
义一个GDB的变量很简单只需。使用GDB的set命令。GDB的环境变量和UNIX一样,
也是以$起头。如:
set $foo = *object_ptr
使用环境变量时,GDB会在你第一次使用时创建这个变量,而在以后的使用中,则直接对
其賦值。环境变量没有类型,你可以给环境变量定义任一的类型。包括结构体和数组。
show convenience
该命令查看当前所设置的所有的环境变量。
这是一个比较强大的功能,环境变量和程序变量的交互使用,将使得程序调试更为灵活便捷。
例如:
set $i = 0
print bar[$i++]->contents
于是,当你就不必,print bar[0]->contents, print bar[1]->contents地输入命令了。输入这样的
命令后,只用敲回车,重复执行上一条语句,环境变量会自动累加,从而完成逐个输出的功
能。


其他有益的参考

【1】GNU Project Debugger: More fun with GDB
此文中介绍了各种define的command,可以用来简化命令的输入。
【2】 陈皓博客:用GDB调试程序 包括的很详尽的对各种命令的介绍
【3】GDB中应该知道的几个调试方法 常用的几个GDB技巧,例如调试macro,条件断点,command命令等等。


BTW:

刚刚发现进入blog的时候又是白屏了,原因还是MySQL没有自动启动。
从这里找解决方法,希望管用:
http://ubuntuforums.org/showthread.php?t=1668170

sudo apt-get install sysv-rc-conf
sudo sysv-rc-conf
把mysql在level 2,3,4,5中选中。

学习和应用Google C++ Coding Style Guide (in Emacs)

Learning and applying coding style from Google (in Emacs)

今天李开复的博客转发了一条围脖,大意是:Google C++ Coding Style是最好的Coding Style,没有之一。
以前虽然经Paul提示过,但当时的我并没有提起足够的重视,现在重新看了一下,受益匪浅。
http://google-styleguide.googlecode.com/svn/trunk/cppguide.xml Google C++ Style Guide

这个Style Guide不仅提示并规定了如何格式化代码,还对C++中的特性做了对比和使用建议。例如:
(1) 对于引用(reference)的参数,应该尽量使用const来做修饰,否则我们不知道程序中修改的值会不会有超出该函数的作用;
(2) 对于要修改值的参数,则提倡使用指针。
(3) 还有,对于构造函数Constructor,Google 认为应使用explicit关键字来修饰,这样防止编译器做隐式的类型转换,同时构造函数必须明确的写出来,即使是与default的形式是相同的。
(4) 对于头文件的引用,Google 建议使用Forward declaration(提前声明)来减少包含过多的文件次数

在这个Style Guide之中,还提到了一个有用的工具cpplint.py, 这个Python工具可以对照Google Style Guide去检查你的代码是否符合规范。我是一个Emacs fans,那么如何把Google Style Guide 和 我们的.emacs配置结合起来呢?
首先你需要下载这个文件: google-c-style.el
之后考虑到我所在的小组要求Tab-indent是4个空格,并且要求用空格替代Tab,那么我们的.emacs配置如下:

(require 'cc-mode)
(require 'google-c-style)
(defun my-build-tab-stop-list (width)
  (let ((num-tab-stops (/ 80 width))
	(counter 1)
	(ls nil))
    (while (<= counter num-tab-stops)
      (setq ls (cons (* width counter) ls))
      (setq counter (1+ counter)))
    (set (make-local-variable 'tab-stop-list) (nreverse ls))))
(defun my-c-mode-common-hook ()
  (c-set-style "google")
  (setq tab-width 4) ;; change this to taste, this is what K&R uses :)
  (my-build-tab-stop-list tab-width)
  (setq c-basic-offset tab-width)
  (setq indent-tabs-mode nil) ;; force only spaces for indentation
  (local-set-key "\C-o" 'ff-get-other-file)
  (c-set-offset 'substatement-open 0)
  (c-set-offset 'arglist-intro c-lineup-arglist-intro-after-paren)
  )
;; google sytle is defined in above function
(add-hook 'c-mode-common-hook 'my-c-mode-common-hook)
(add-hook 'c++-mode-common-hook 'my-c-mode-common-hook)

如何配置.emacs里并加入cpplint功能呢?只需在.emacs里加入如下代码:

(defun cpplint ()
  "check source code format according to Google Style Guide"
  (interactive)
  (compilation-start (concat "python ~/bin/cpplint.py " (buffer-file-name))))

我们只需要执行M-x cpplint就可以得到格式检查的结果。用C-x `,或者M-g n, M-g p可以上下切换。

另一个常用的功能是如何将多个源文件通过Emacs来调整格式的(batch indent source code)?
参考 Batch Indentation with Emacs,文中提到的方法可以用默认的代码风格来格式化源文件。
但我们的目标是用Google风格来格式话代码,那么只需要稍作改变:
~/bin/emacs-format-function

;;; File: emacs-format-file
;;; Stan Warford
;;; 17 May 2006
;; from: http://www.cslab.pepperdine.edu/warford/BatchIndentationEmacs.html

;; Adopt by Xiaowei Zhan 2011 from .emacs
(require 'google-c-style)
(defun emacs-format-function ()
  "Format the whole buffer."
  (setq tab-width 4) ;; change this to taste, this is what K&R uses :)
  (setq c-basic-offset tab-width)
  (c-set-offset 'substatement-open 0)
  ;; next line is strange, I copied it from .emacs, but it cannot find c-lineup-arglist-intro-after-paren
  ;; however, disable this line seems working as well.
  ;;(c-set-offset 'arglist-intro c-lineup-arglist-intro-after-paren) 
  (indent-region (point-min) (point-max) nil)
  (untabify (point-min) (point-max))
  (save-buffer)
  )

~/bin/my-indent

#!/bin/bash
# File: my-indent
# Opens a set of files in emacs and executes the emacs-format-function.
# Assumes the function named emacs-format-function is defined in the
# file named emacs-format-file.

if [ $# == 0 ]
then
   echo "my-indent requires at least one argument." 1>&2
   echo "Usage: my-indent files-to-indent" 1>&2
   exit 1
fi
while [ $# -ge 1 ]
do
   if [ -d $1 ]
   then
      echo "Argument of my-indent $1 cannot be a directory." 1>&2
      exit 1
   fi
   # Check for existence of file:
   ls $1 2> /dev/null | grep $1 > /dev/null
   if [ $? != 0 ]
   then
      echo "my-indent: $1 not found." 1>&2
      exit 1
   fi
   echo "Indenting $1 with emacs in batch mode"
   emacs -batch $1 -l ~/emacs/google-c-style.el -l ~/bin/emacs-format-file -f emacs-format-function
   echo
   shift 1
done
exit 0

#from http://www.cslab.pepperdine.edu/warford/BatchIndentationEmacs.html

值得注意的是Google除了C++ Style Guide, 还提供JavaScript Style Guide, Objective-C Style Guide, and Python Style Guide。对这些语言感兴趣的朋友可以到Google Style Guide发掘。

Exact Logistic Regression

We will briefly explain why we would be interested in implementing exact logistic regression, then provides C++ and R codes.

1. Why exact test?

Since we want to have a clear mind of how likely/unlikely the realization we observed. In the classic example of 2×2 table without covariates, especially the 2×2 table has very few (<5) occurrence, Fisher exact tests are often applied, and large sample theory cannot give an accurate estimation.

2. Why exact logistic regression?

Fisher’s exact test cannot applied to logistic model. For example, when we have covariates in the model, we want BOTH estimate the effect size and get its exact p-value. In this case, only exact logistic regression provides solution.The theoretical background is provided in reference [1].

My implementation:

Download: exactLogisticRegression.tar

1. I verified the results with SAS.
2. The speed is comparable to, or faster than SAS.

Cons:
1. Only 1 interested parameter conditioning on all other parameter is supported for now.
2. I have not implemented the confidence limit parts, as it’s a bit more tedious.

R binding : mypackage_1.0.tar

See mypackage/R/rcpp_hello_world.R, I wrote a R function to wrap the C++ function.

R binding is helped by RCpp package. It greatly reduced the workload of exchanging date (in the form of matrix, list, vector) between C++ and R. A quick tutorial can be found from RCpp homepage(http://dirk.eddelbuettel.com/code/rcpp.html). For experienced Rcpp user, the quick-ref documentation (http://dirk.eddelbuettel.com/code/rcpp/Rcpp-quickref.pdf) is helpful.

【1】 Exact Logistic Regression, Robert E. Derr, SAS Institute Inc., Cary, NC http://support.sas.com/rnd/app/da/new/daexactlogistic.html

【2】Rcpp: Rcpp: Seamless R and C++ Integration dirk.eddelbuettel.com/code/rcpp.html

OpenMP使用经验

为了利用OpenMP来加速C/Fortran程序,我记录一些阅读OpenMP API Version 3.0 Specification (May 2008)的经验。另外,这篇文章主要关注C语言中OpenMP的使用经验。

本文包括 摘要、经验和其他注意事项、参考 三部分。

摘要 (按照Specification的顺序)

(1)第一章是Glossary, 定义了各种OpenMP使用的名词(terms),例如:construct, directive, clause, task, tied task … 这个可以在看不懂的时候返回来查询。其中有一个被多次使用的名词是sentinel,这似乎是Fortran中使用OpenMP时应该使用的名词,和C并没有关系。

(2)2.2:  _OPEN 这个macro 被定义成yyyymm形式,表示OpenMP API的版本

(3) parallel construct:表示紧挨着的程序可以parallel运行。用#pragma omp parallel 来使用,当程序遇到parallel construct之后,会用固定个数的threads形成一个team去完成work。至于有多少个threads,这不一定,可参考2.4.1中决定threads number的算法。注意,当parallel里一个thread结束的时候,其他的threads都会被结束 (If execution of a thread terminates while inside a parallel region, execution of all threads in all teams terminates. If execution of a thread terminates while inside a parallel region, execution of allthreads in all teams terminates.)

(4) worksharing construct:有4类:loop;sections constructs;single construct;workshare construct

对于worksharing loop construct来说,有5种scheduling,即安排工作,的方式。static(静态分配), dynamic(每一个thread动态要求一个chunk of iterations), guided(execution thread负责给其他threads分配chunks), auto(根据compiler和system的情况决定), runtime(运行期决定)。2.5.1.1给出了一个决定scheduling的流程图

四种类型的区别:

loop:在C中紧接着一个for循环

section:与loop类似,不必要是for循环,只要是structure block就行

single:只能由一个thread执行(不一定是master thread)

worshare:只有Fortran中出现,是把structure block分成若干份,每一份由一个thread执行

(5)2.6节讲了结合parallel construct 和worksharing construct,就是这两个construct可以合在一起用。然后分3个小节介绍了parallel loop construct (相当于loop construct 后直接用parallel construct),parallel section construct(相当于section construct 后直接用parallel construct)和parallel workshare construct(相当于worshare construct 后直接用parallel construct)。

(6)2.7节是task construct,这定义了一个task。当一个thread碰到task construct的时候会立刻产生一个task,并按照data-share attribute的指示准备相应的数据环境(data environment)。这个task可能被立刻执行,也可能被延后执行。

注意当task construct带有if clause (if 从句)的时候,当前的 thread会暂停(suspend)当前的task,并切换到刚刚生成的task。这里的if clause中的变量对于task construct后的structure block是引用型的(不是传值,是传引用)。默认的task是tied task (这个task被某个thread suspend后,只能由这个thread来resume)

task scheduling point 是指在这一点可以改变task的状态(如可以被suspended),或是task 结束的位置。包括task construct开始的地方;taskwait construct开始的地方;遇到barrier directive;隐含的barrier 区域; 在tied task region的末尾。

(7)2.8节介绍了master and synchronization constructs,包括master constructs(只有master thread可以执行), critical constructs(同一时间只能有一个thread来执行。可以给critical constructs起名字), barrier constructs(指定一个明确的barrier,举例:在parallel region的explicit tasks必须在barrier之前都完成,之后的程序才能继续执行。注:在C语言中使用有一定限制。), taskwait constructs(等待当前task生成的子程序全部完成), atomic constructs(原子语句,注:只支持+,-,*,/,++,–,|, &,+=,-=,*=等简单运算,原子性只是保证赋值的那一步), flush constructs(保证thread view里的数据和memory的数据相吻合,另外需考虑不同thread执行flush的order,见74页的范例), ordered constructs(保证按照loop region指定的顺序来运行thread).

(8)2.9节是Data Environment数据环境,即并行计算时不同thread间的变量是如何影响的。

construct里变量的数据共享属性(Data-sharing Attribute):提前决定的(private:用threadpriviate声明的,在construct里声明的,for construct里的循环变量;shared:在heap上的,static的变量),显示决定的(在construct上指明的),隐示决定的(default clause可以指定的;如果default clause没有指定,则比较复杂,例如parallel construct中是shared,全部规则见79页)。额外的不能由上面隐式规则推出的可以见92页。 (我认为如果数据共享属性已经复杂到不好看出,那是不是这个程序本身写的太不清晰了!)

不在construct里而是在region里的数据共享属性(Data-sharing Attribute),见2.9.1.1

threadprivate见2.9.2

default的数据共享属性见2.9.3 。包括shared, private,firstprivate(private,且给变量赋初值),lastprivate(private,在task结束后会改变原始变量的值),reduction(做functional programming里的reduction,需要提供运算符。先使用private copy,然后用初始值做reduce,最后更新原始的变量)

数据拷贝从句(Data Copy Clause),见2.9.4

(9)第3章是运行库里的子程序

3.1 所有函数的原型在omp.h中,都是用C做链接(link)的。

3.2 控制执行环境的函数,包括设置/取得线程数,得到最多的支持的线程数,设置线程数的上限等等。

3.3 Lock程序,这是为了给线程加锁而提供的函数,分简单锁(simple lock)和级联锁(nested lock,区别是可以set多次)

3.4 时间程序。只有两个:omp_get_wtime() 返回double型的时间 和omp_get_wtick()返回1秒等于多少个时钟的tick

(10)第4章讲环境变量,可以通过设置环境变量来改变调度方式(schedule type)OMP_SCHEDULE,线程数OMP_NUM_THREADS ,最多的线程数OMP_THREAD_LIMIT等等

(11)第5章有各种各样的样例程序。这样当我们不清楚概念的时候,都可以快速的查看,例如如何使用lock,如何用reduction……

经验其他注意事项:

这个Specification里很有结构化,对于各种construct都给出了Summary,Syntax,Binding(使用范围), Description,Restriction。

网上一些程序中常常显示指明shared variable,这样做可能是为了减少不必要的数据拷贝。

对于多重循环,只对外层循环并行化处理不一定能达到负载均衡。解决方法可以用,把多重循环合并成一层循环,见【4】

参考:

【1】OpenMP Specification Version 3.0 Complete Specifications – (May, 2008). (PDF)

【2】OpenMP C/C++ Summary Card http://www.openmp.org/mp-documents/OpenMP3.0-SummarySpec.pdf

【3】Wikipedia (其中介绍OpenMP语言架构的图很不错)http://en.wikipedia.org/wiki/OpenMP

【4】对多重循环的优化 http://blog.csdn.net/drzhouweiming/archive/2008/05/23/2472454.aspx

【5】OpenMP 编程指南 http://blog.csdn.net/drzhouweiming/archive/2009/04/20/4093624.aspx